{{#if (not signed_in)}} {{#is help_center.name "Ideagen Help"}} {{#link "sign_in" class="unified-navigation--btn-primary"}}Sign in{{/link}} {{else}} {{#link "sign_in" class="unified-navigation--btn-primary"}}Sign in{{/link}}
{{/is}} {{/if}} {{#if signed_in}}
 {{#is help_center.name "Ideagen Help"}}
Manage tickets
{{else}} {{#link "requests" role="menuitem"}}
Manage tickets {{/link}} {{/is}}
Update profile
Change password
Privacy Policy
Terms of Use
{{#link "sign_out" role="menuitem" class="signOut"}}
Sign out {{/link}}
{{/if}}
{{#is help_center.name "Ideagen Help"}}
Manage tickets
{{else}} {{#link "requests" role="menuitem"}}
Manage tickets {{/link}} {{/is}}
Update profile
Change password
Privacy Policy
Terms of Use
{{#link "sign_out" role="menuitem" class="signOut"}}
Sign out {{/link}}
{{/if}}
{{user.name}}
Looking for help?
Common queries
Send us feedback

Before you start
This form is for Ideagen Luminate feedback only. Your submission will not receive a response.
Looking for support? Select the solution you need help with and open a ticket with us.
We'd love to hear your thoughts on features, usability, or what you love about Ideagen Luminate.

Question
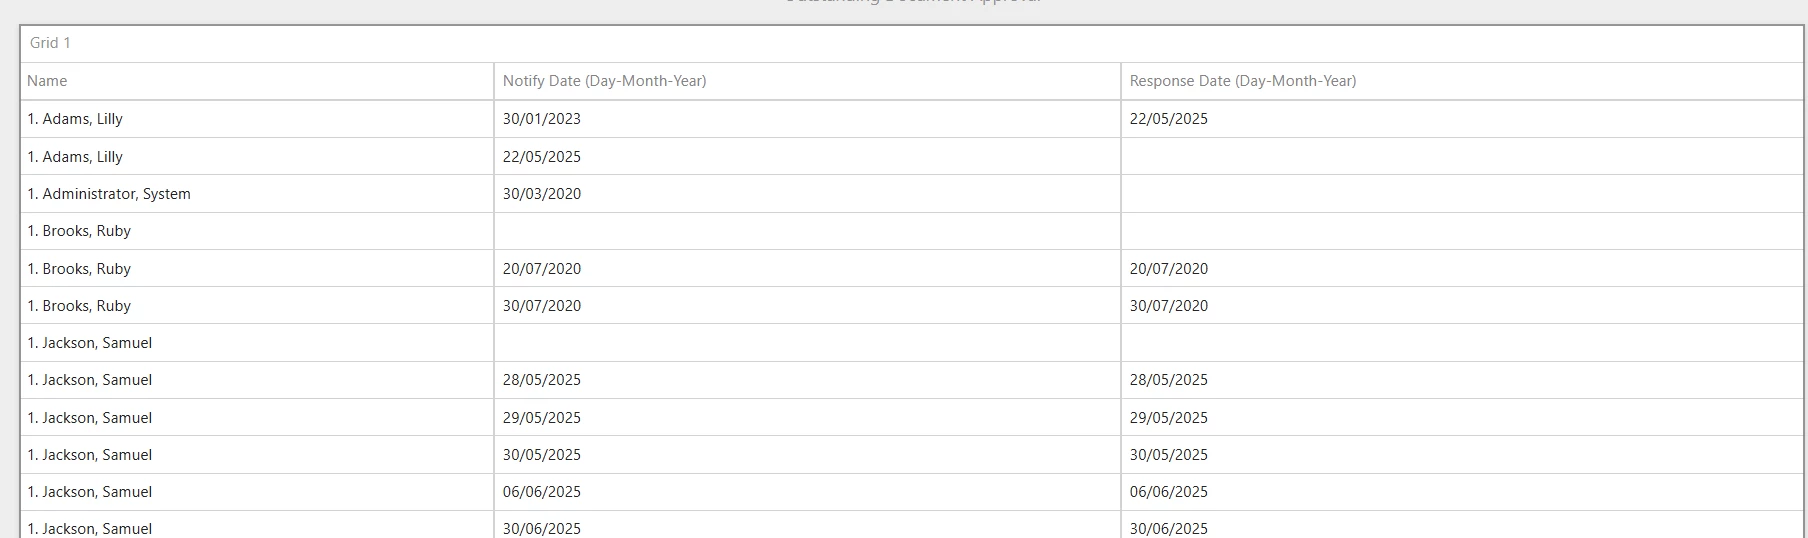
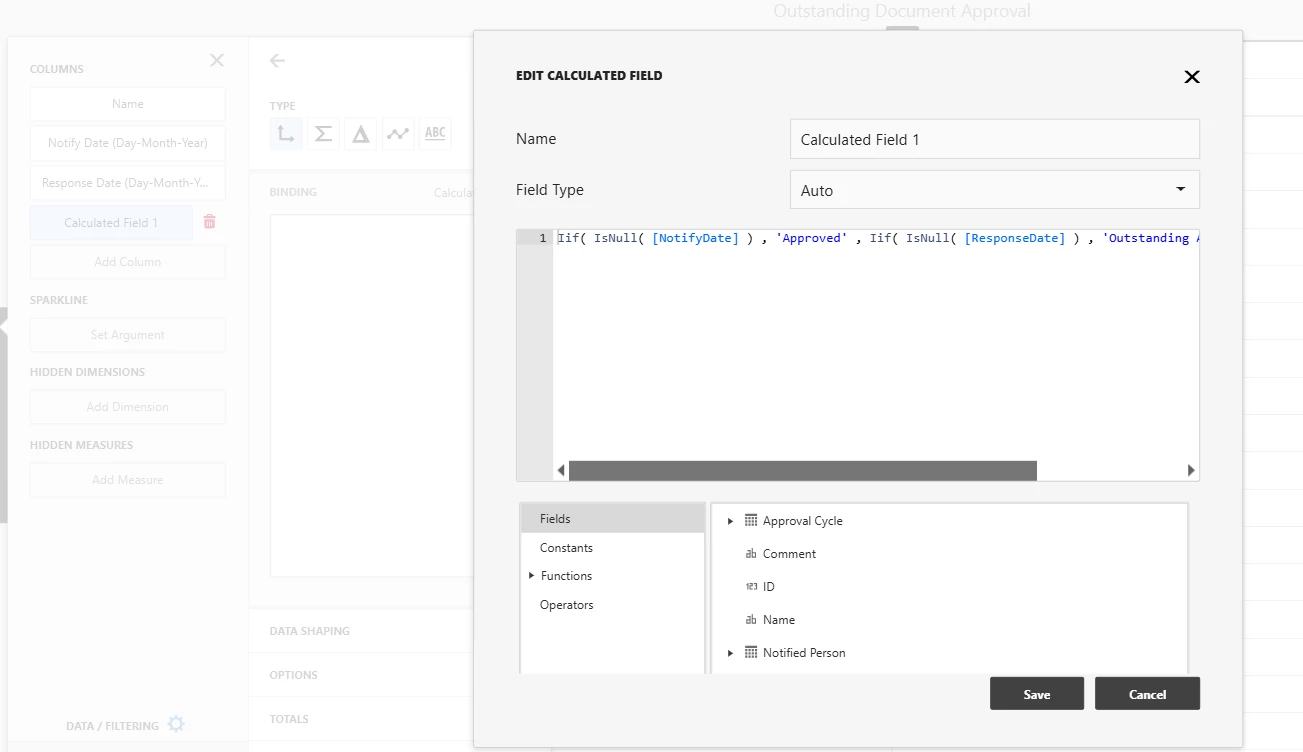
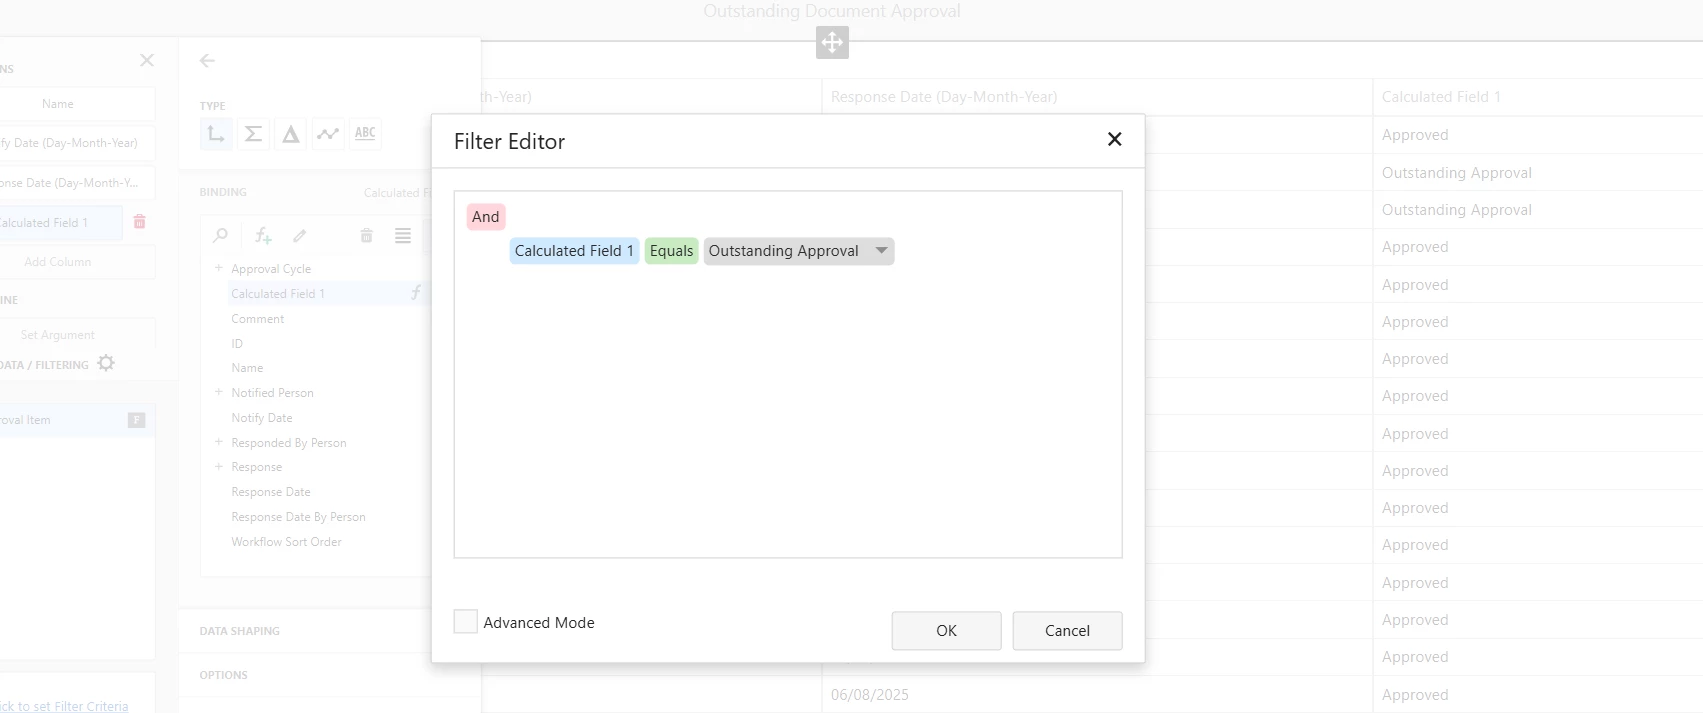
Document approvals - Dashboard
 +1
+1I’ve been tasked with creating a report for outstanding document approvals within IQM and i’ve noticed that there is a Ideagen created dashboard for outstanding copyholders in the dashboards section of the web client.
I’ve been able to show this to my superiors, who like the fact that it is interactive and can show names and departments of who has not acknowledged the document.
Now, has anyone been able to create a dashboard, similar to the one i’ve described, that can show all outstanding document approvals? If so, would you be able to share how it was set up so I can also set it up in my company’s database?
Thanks in advance.

Coming from Skills? Create an Ideagen Luminate account to link your learner profile. Learn more.
Coming from Skills? Create an Ideagen Luminate account to link your learner profile. Learn more.
Coming from Skills? Create an Ideagen Luminate account to link your learner profile. Learn more.
Coming from Skills? Create an Ideagen Luminate account to link your learner profile. Learn more.
Login with SSO
Ideagen Employee Login Login with Ideagen Hubor
Enter your E-mail address. We'll send you an e-mail with instructions to reset your password.